A moss wall from a single photo: from a picture to a CNC file (process study)
A green-wall company wanted to sell moss walls with the client's own graphic: a city skyline, a logo, a photo. We built the whole process on one example, an ordinary photo of Ostrów Tumski in Wrocław taken from the river. Our configurator shows variants in seconds, and a production script turns the chosen one into a vector in millimetres, checks every pocket against a Ø6 cutter and splits the wall into four panels cut from one MDF sheet. The 3D model, the toolpaths and the moss renders all come from the same files.
From a photo to a moss wall
08- 01
Photo
Ostrów Tumski from the river
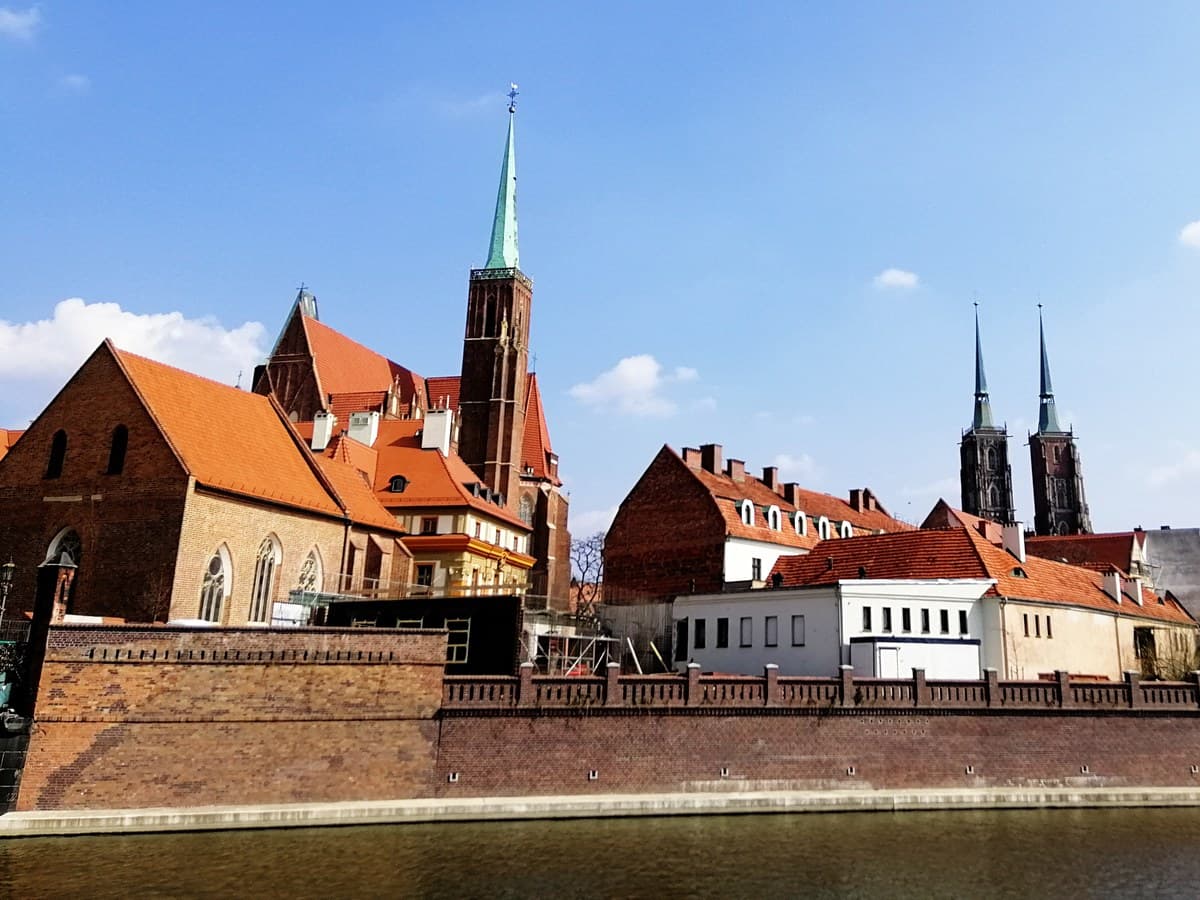
An ordinary photo, cropped to the wall's 4:3 proportion.
- 02
Configurator
live variants, in mm
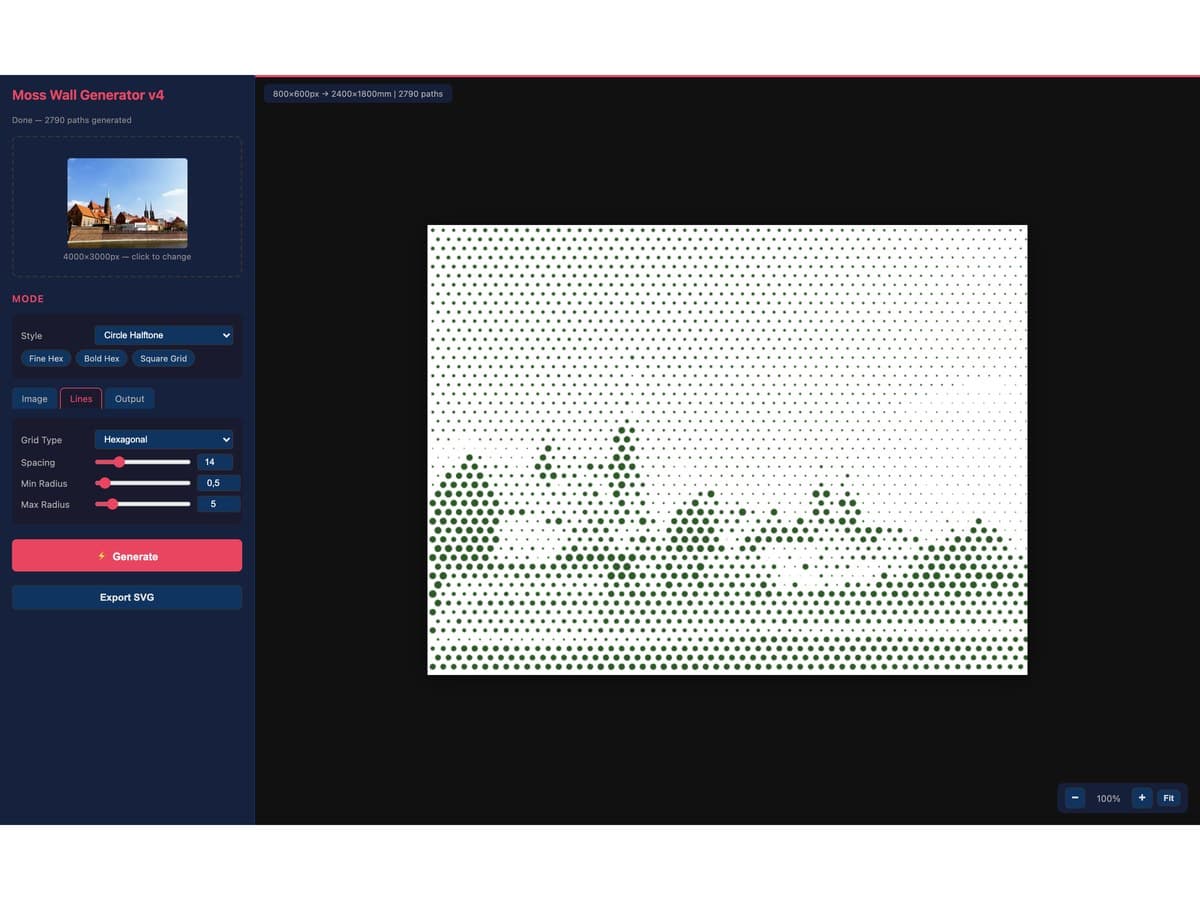
In a meeting the client sees the pattern on their wall within seconds.
- 03
Threshold, hex, lines
three techniques, one photo
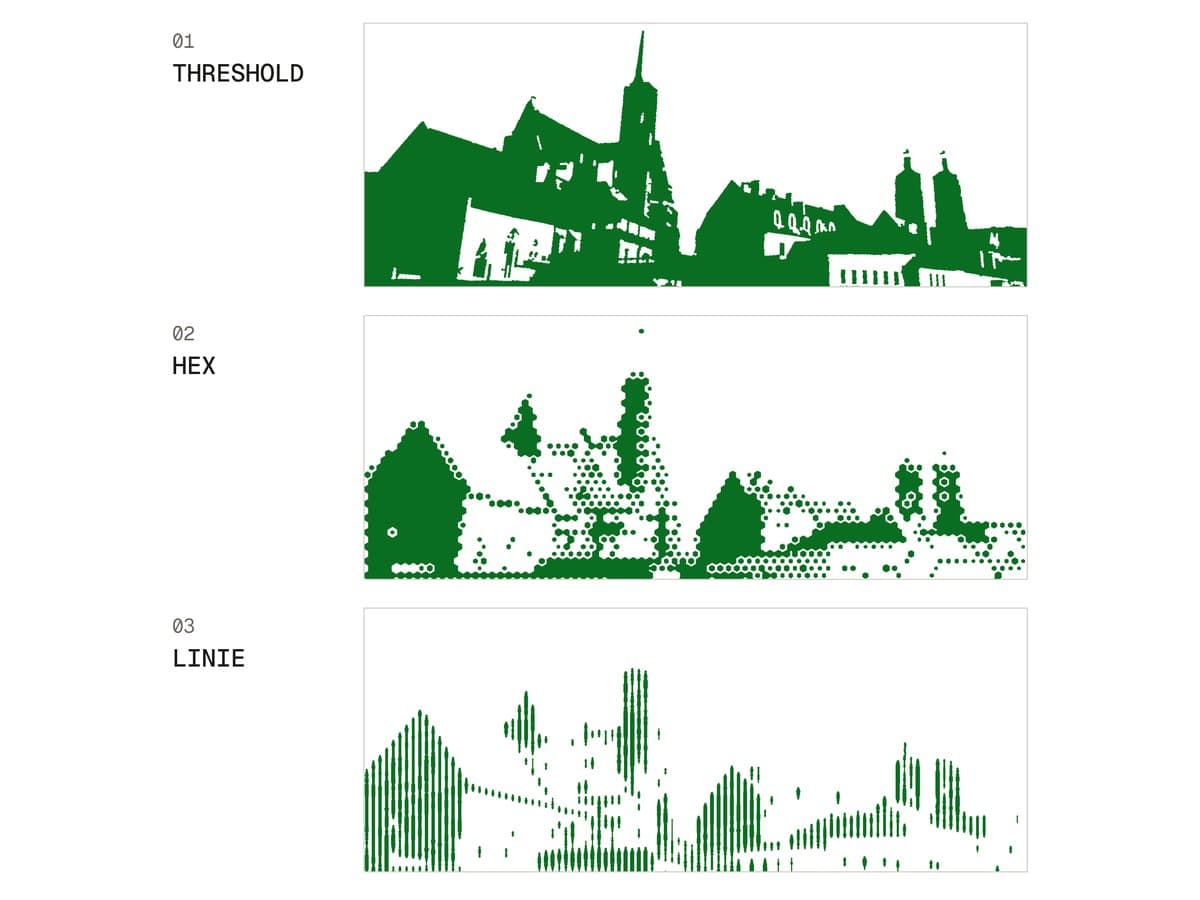
The chosen layout: the silhouette and its reflection in the river, made of grooves.
- 04
Vector and Ø6 check
pocket outlines in mm
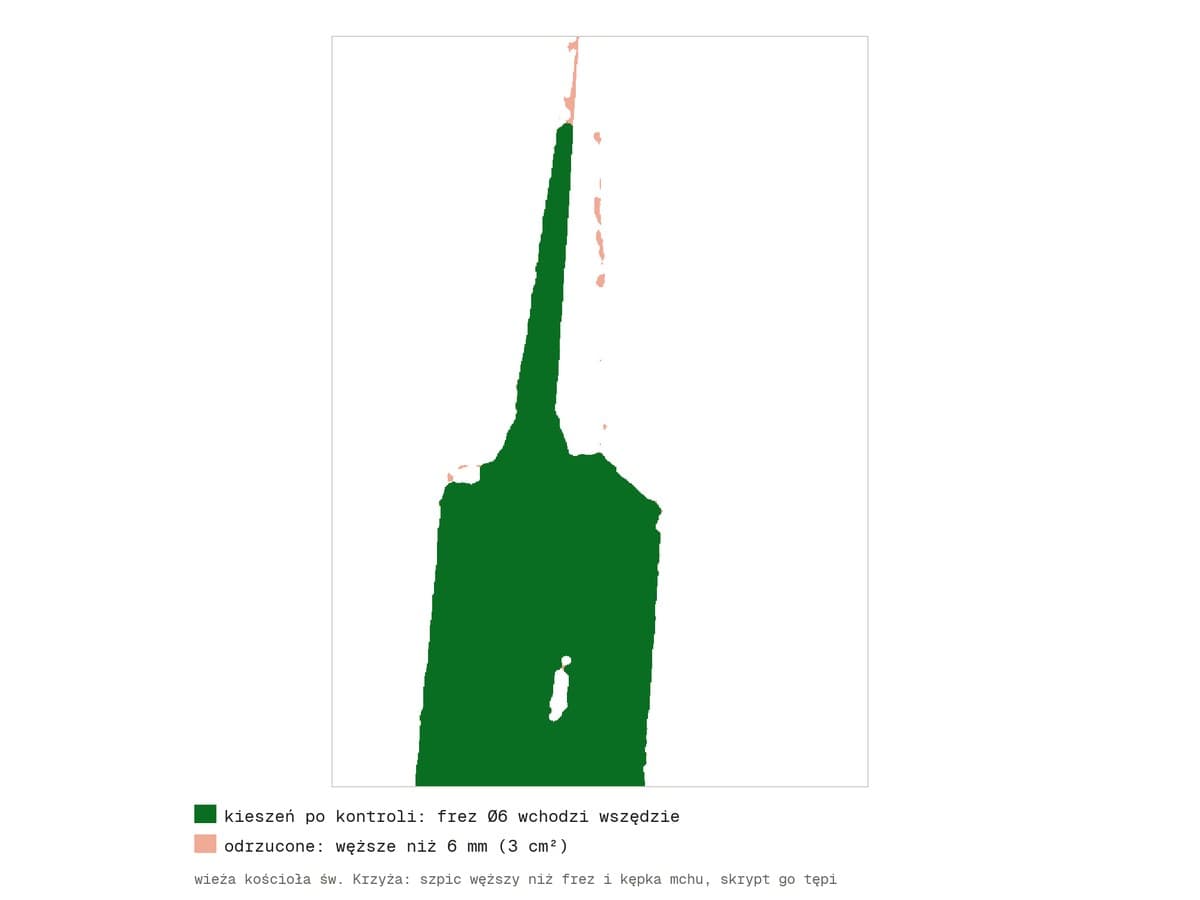
Anything too narrow for the cutter and the moss is blunted by the script before the file reaches the machine.
- 05
3D model
4 panels from one sheet
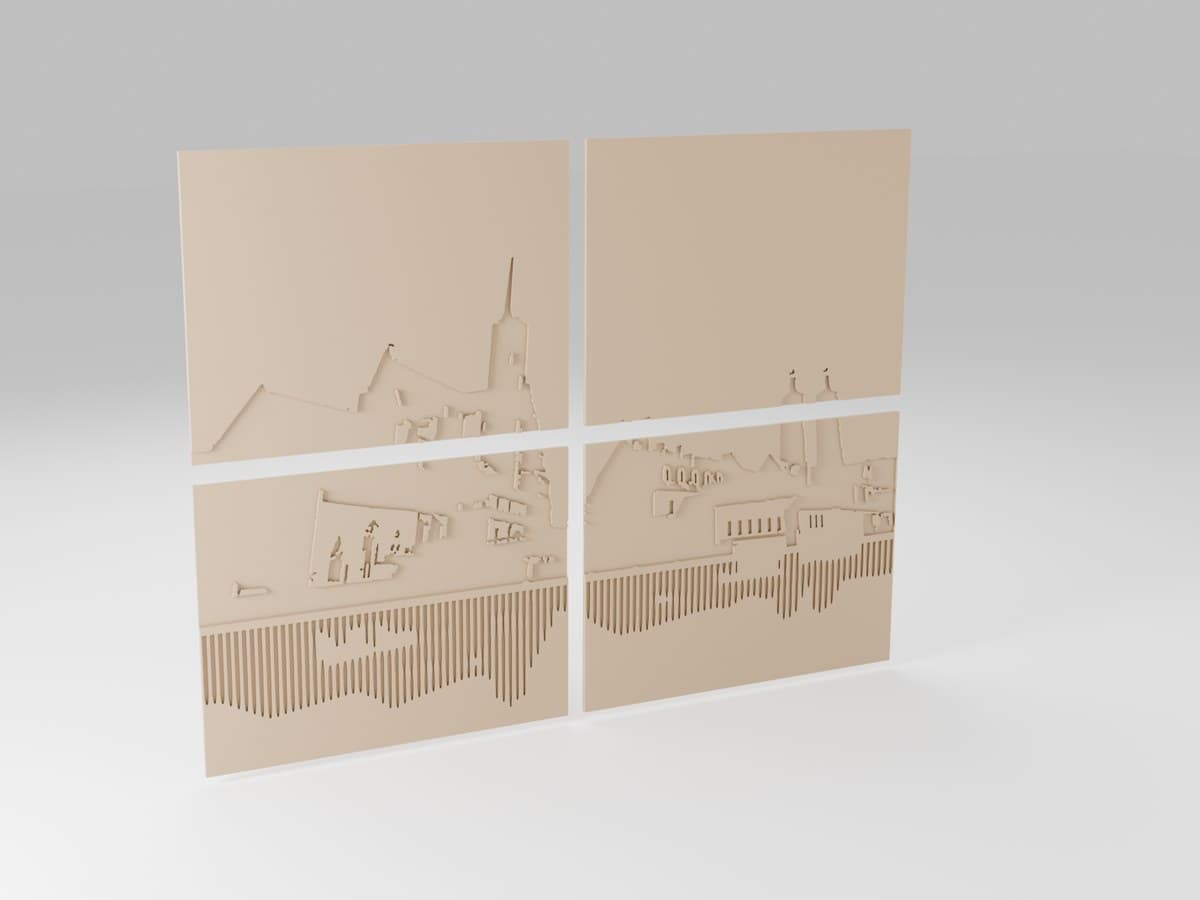
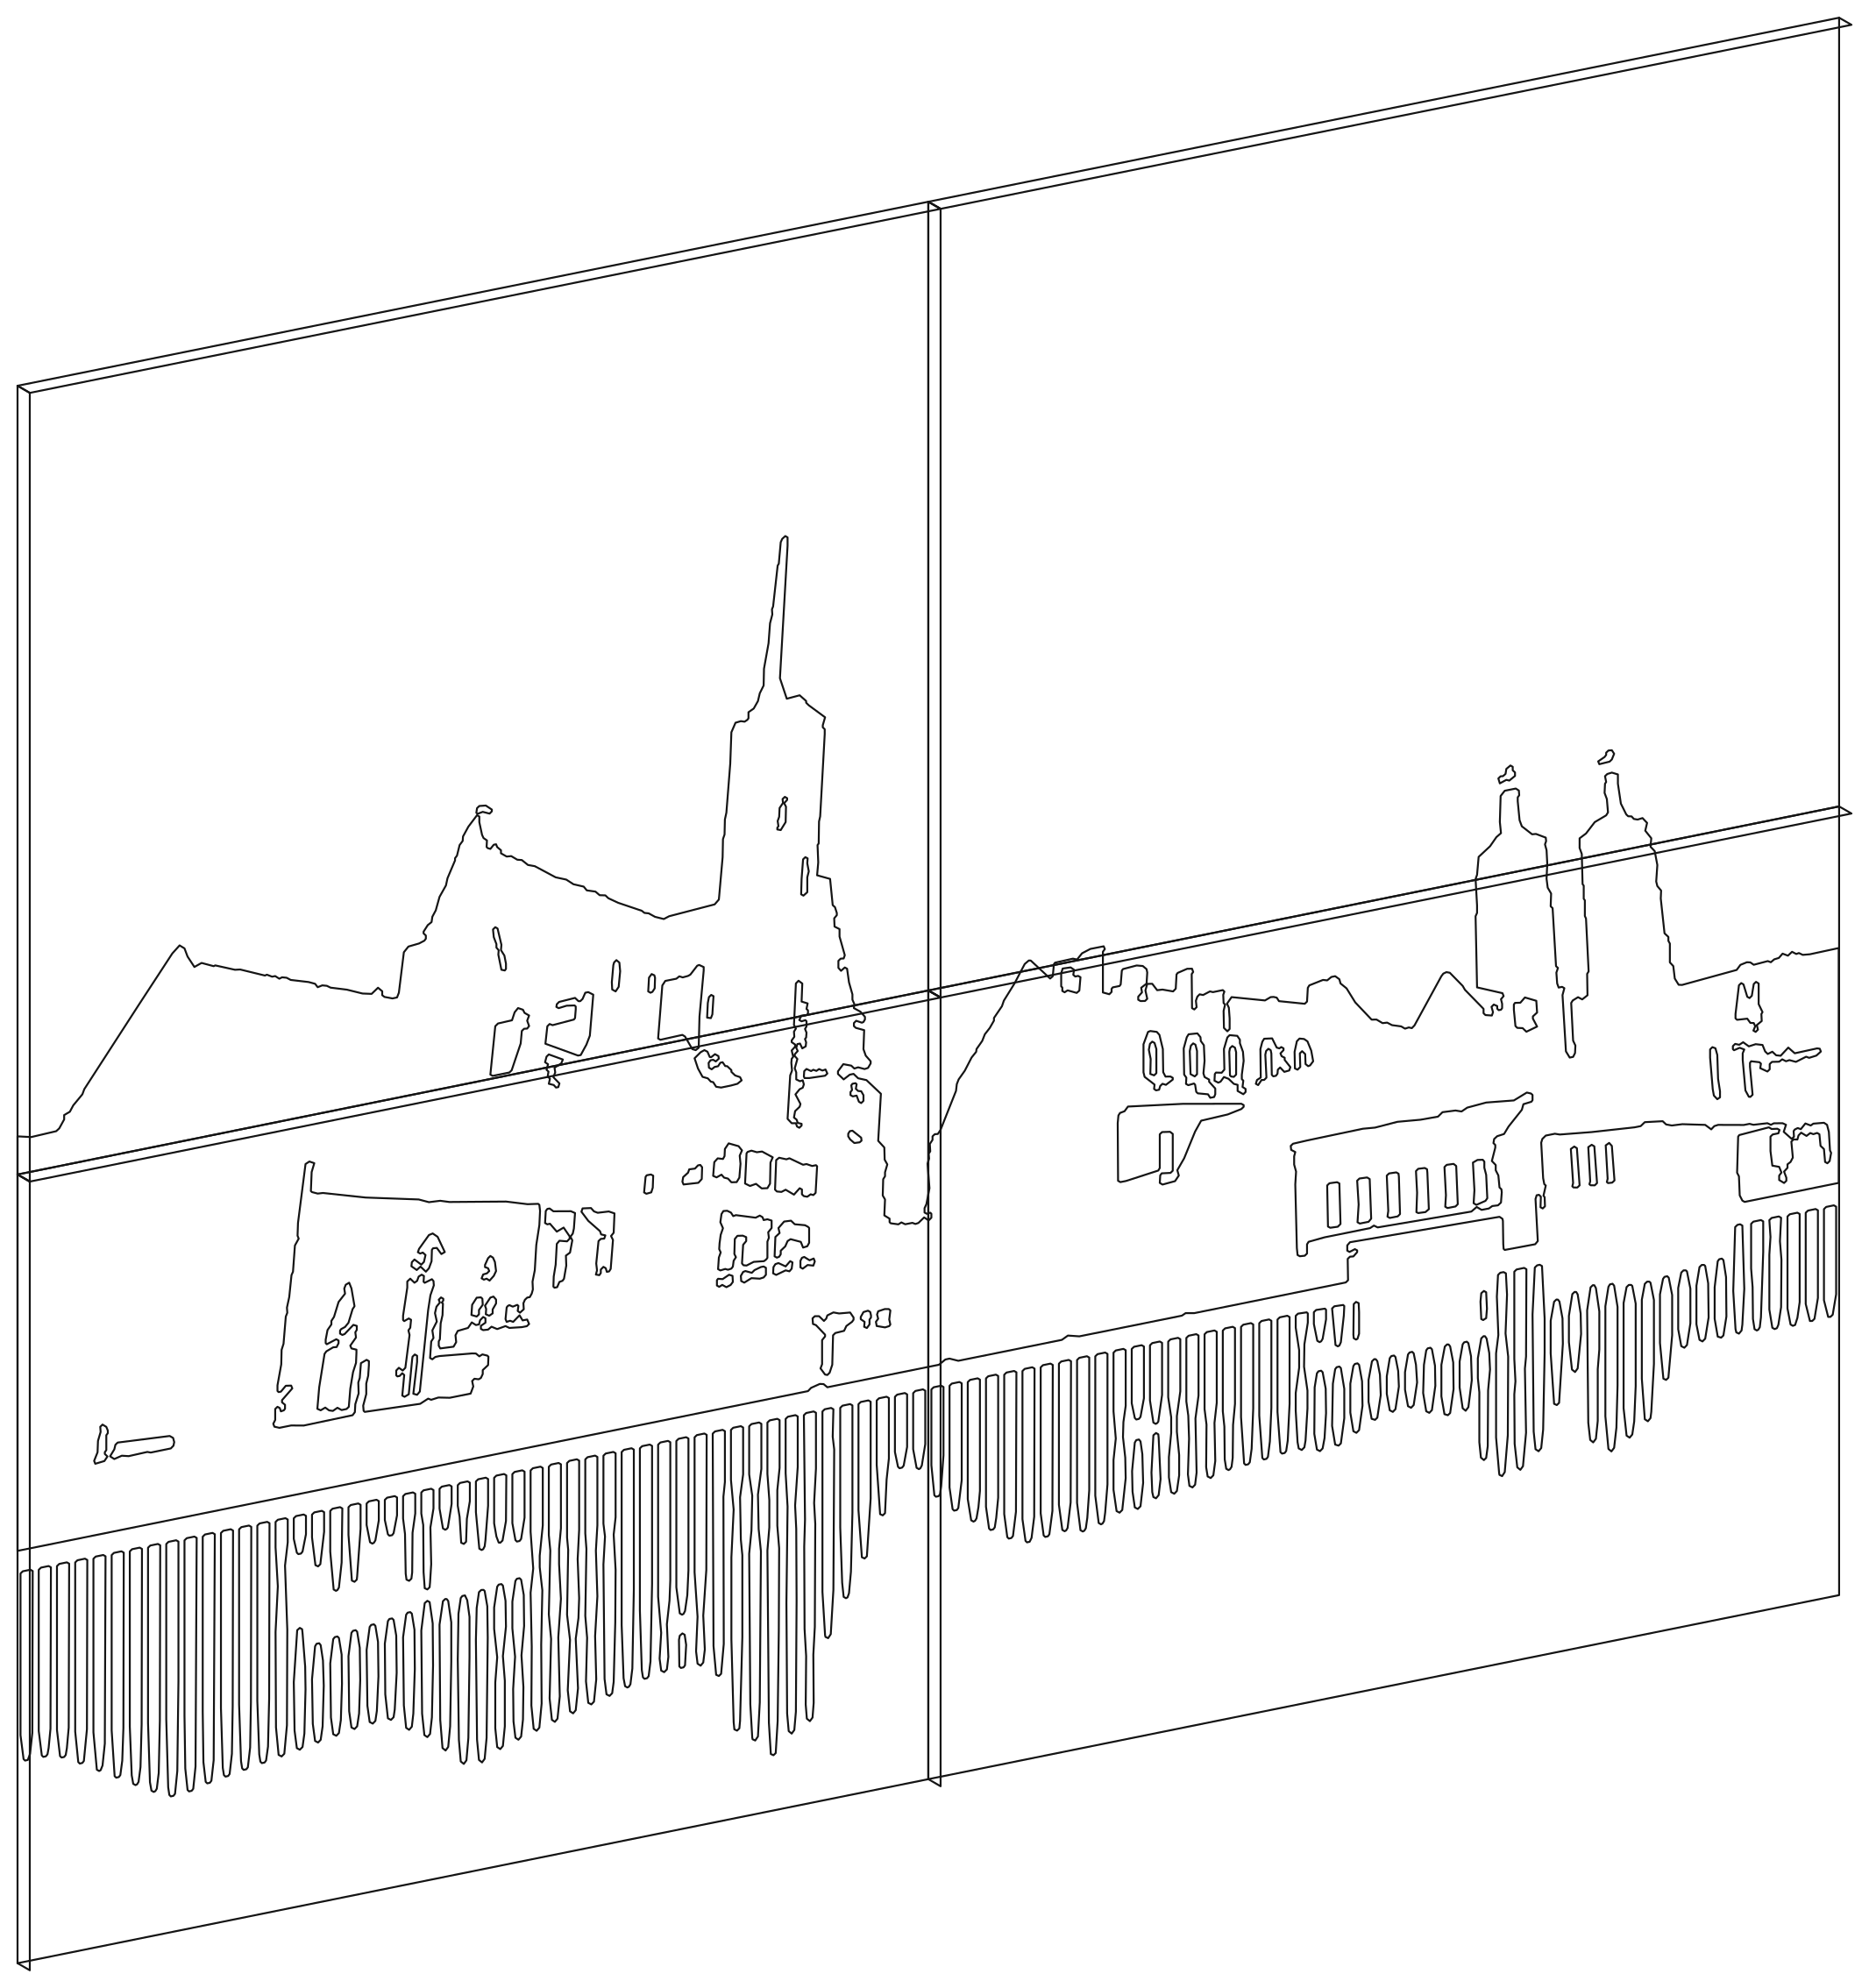
142 pockets 10 mm deep in 18 mm MDF, STEP and DXF files for the shop.
- 06
Milling
CNC at a partner
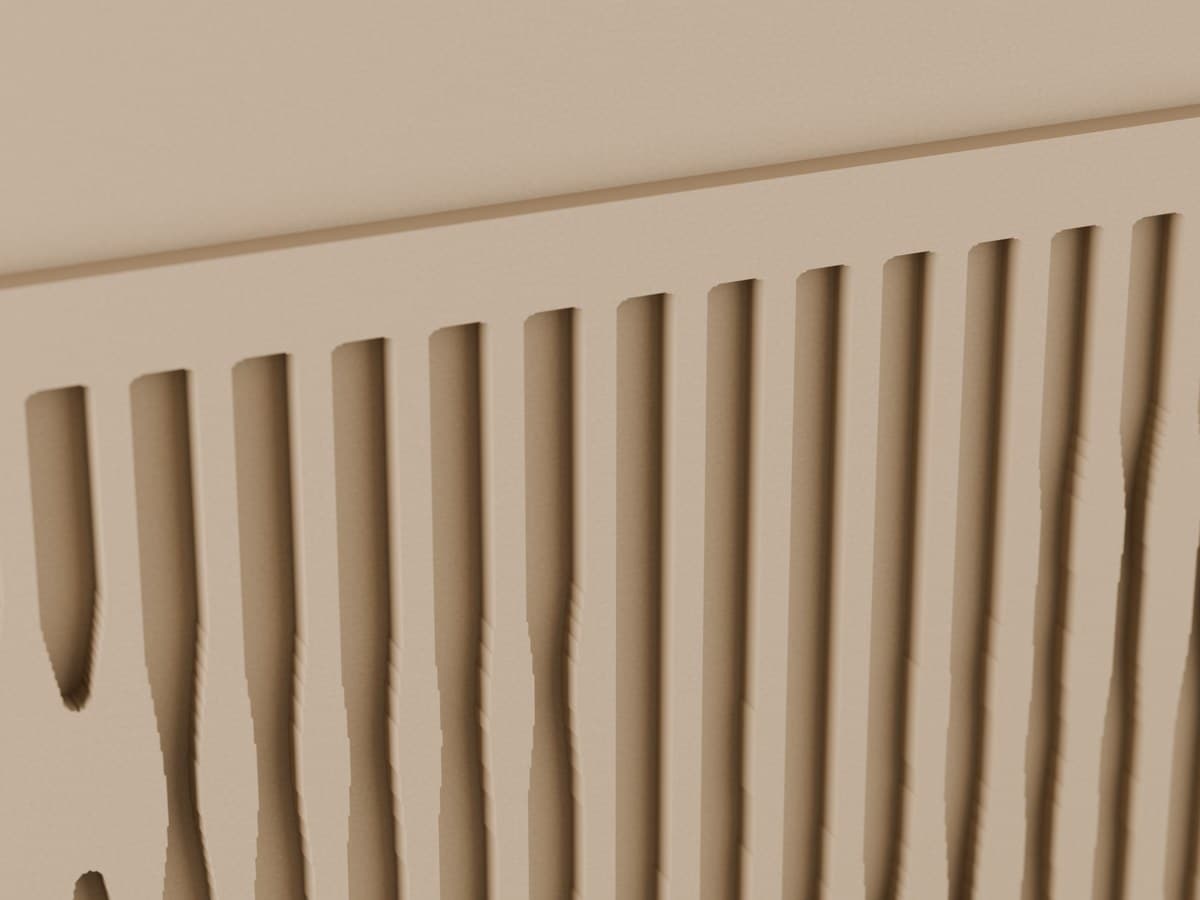
Toolpaths from the same vector; groove ends are round, as the cutter leaves them.
- 07
Moss
hot-glued reindeer moss
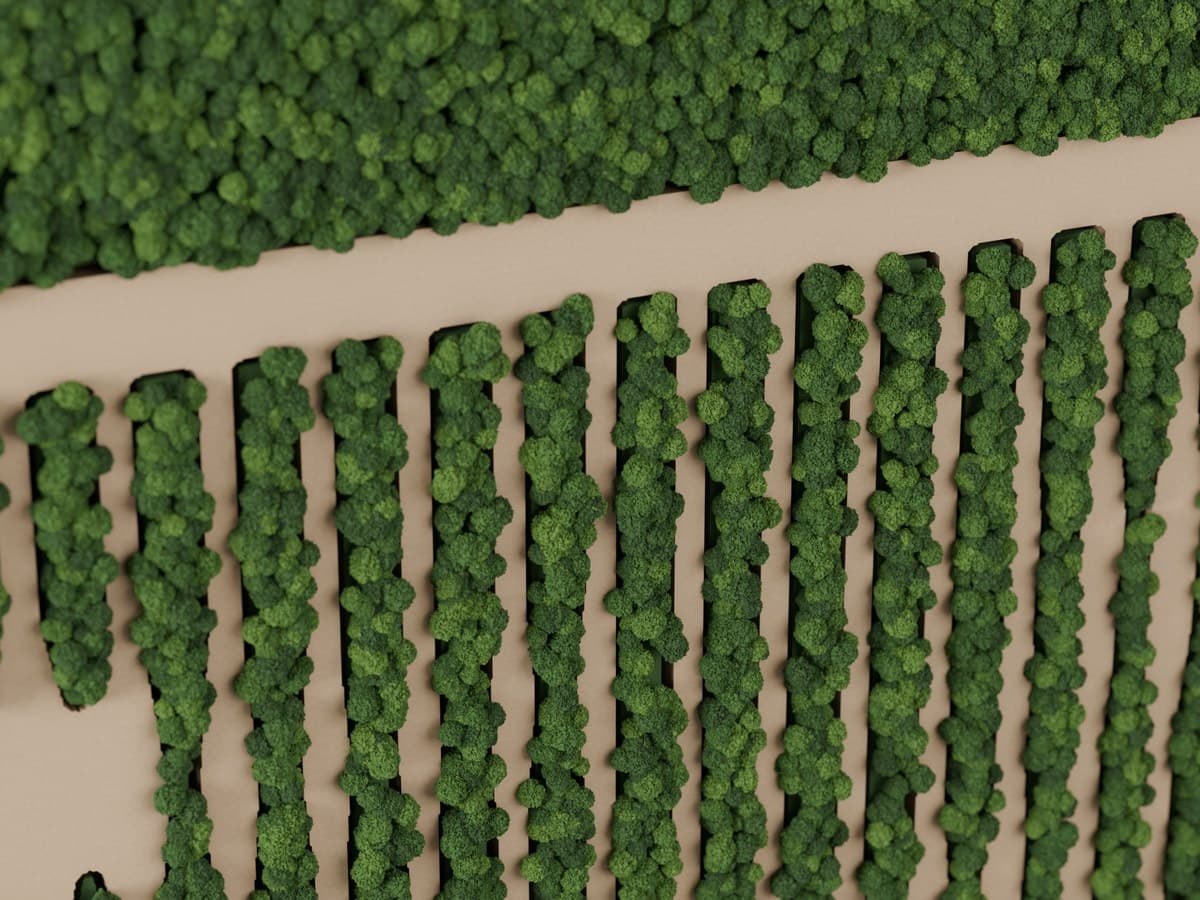
Tufts in the pockets, ribs visible: a photo from afar, texture up close.
- 08
Wall
a render before production
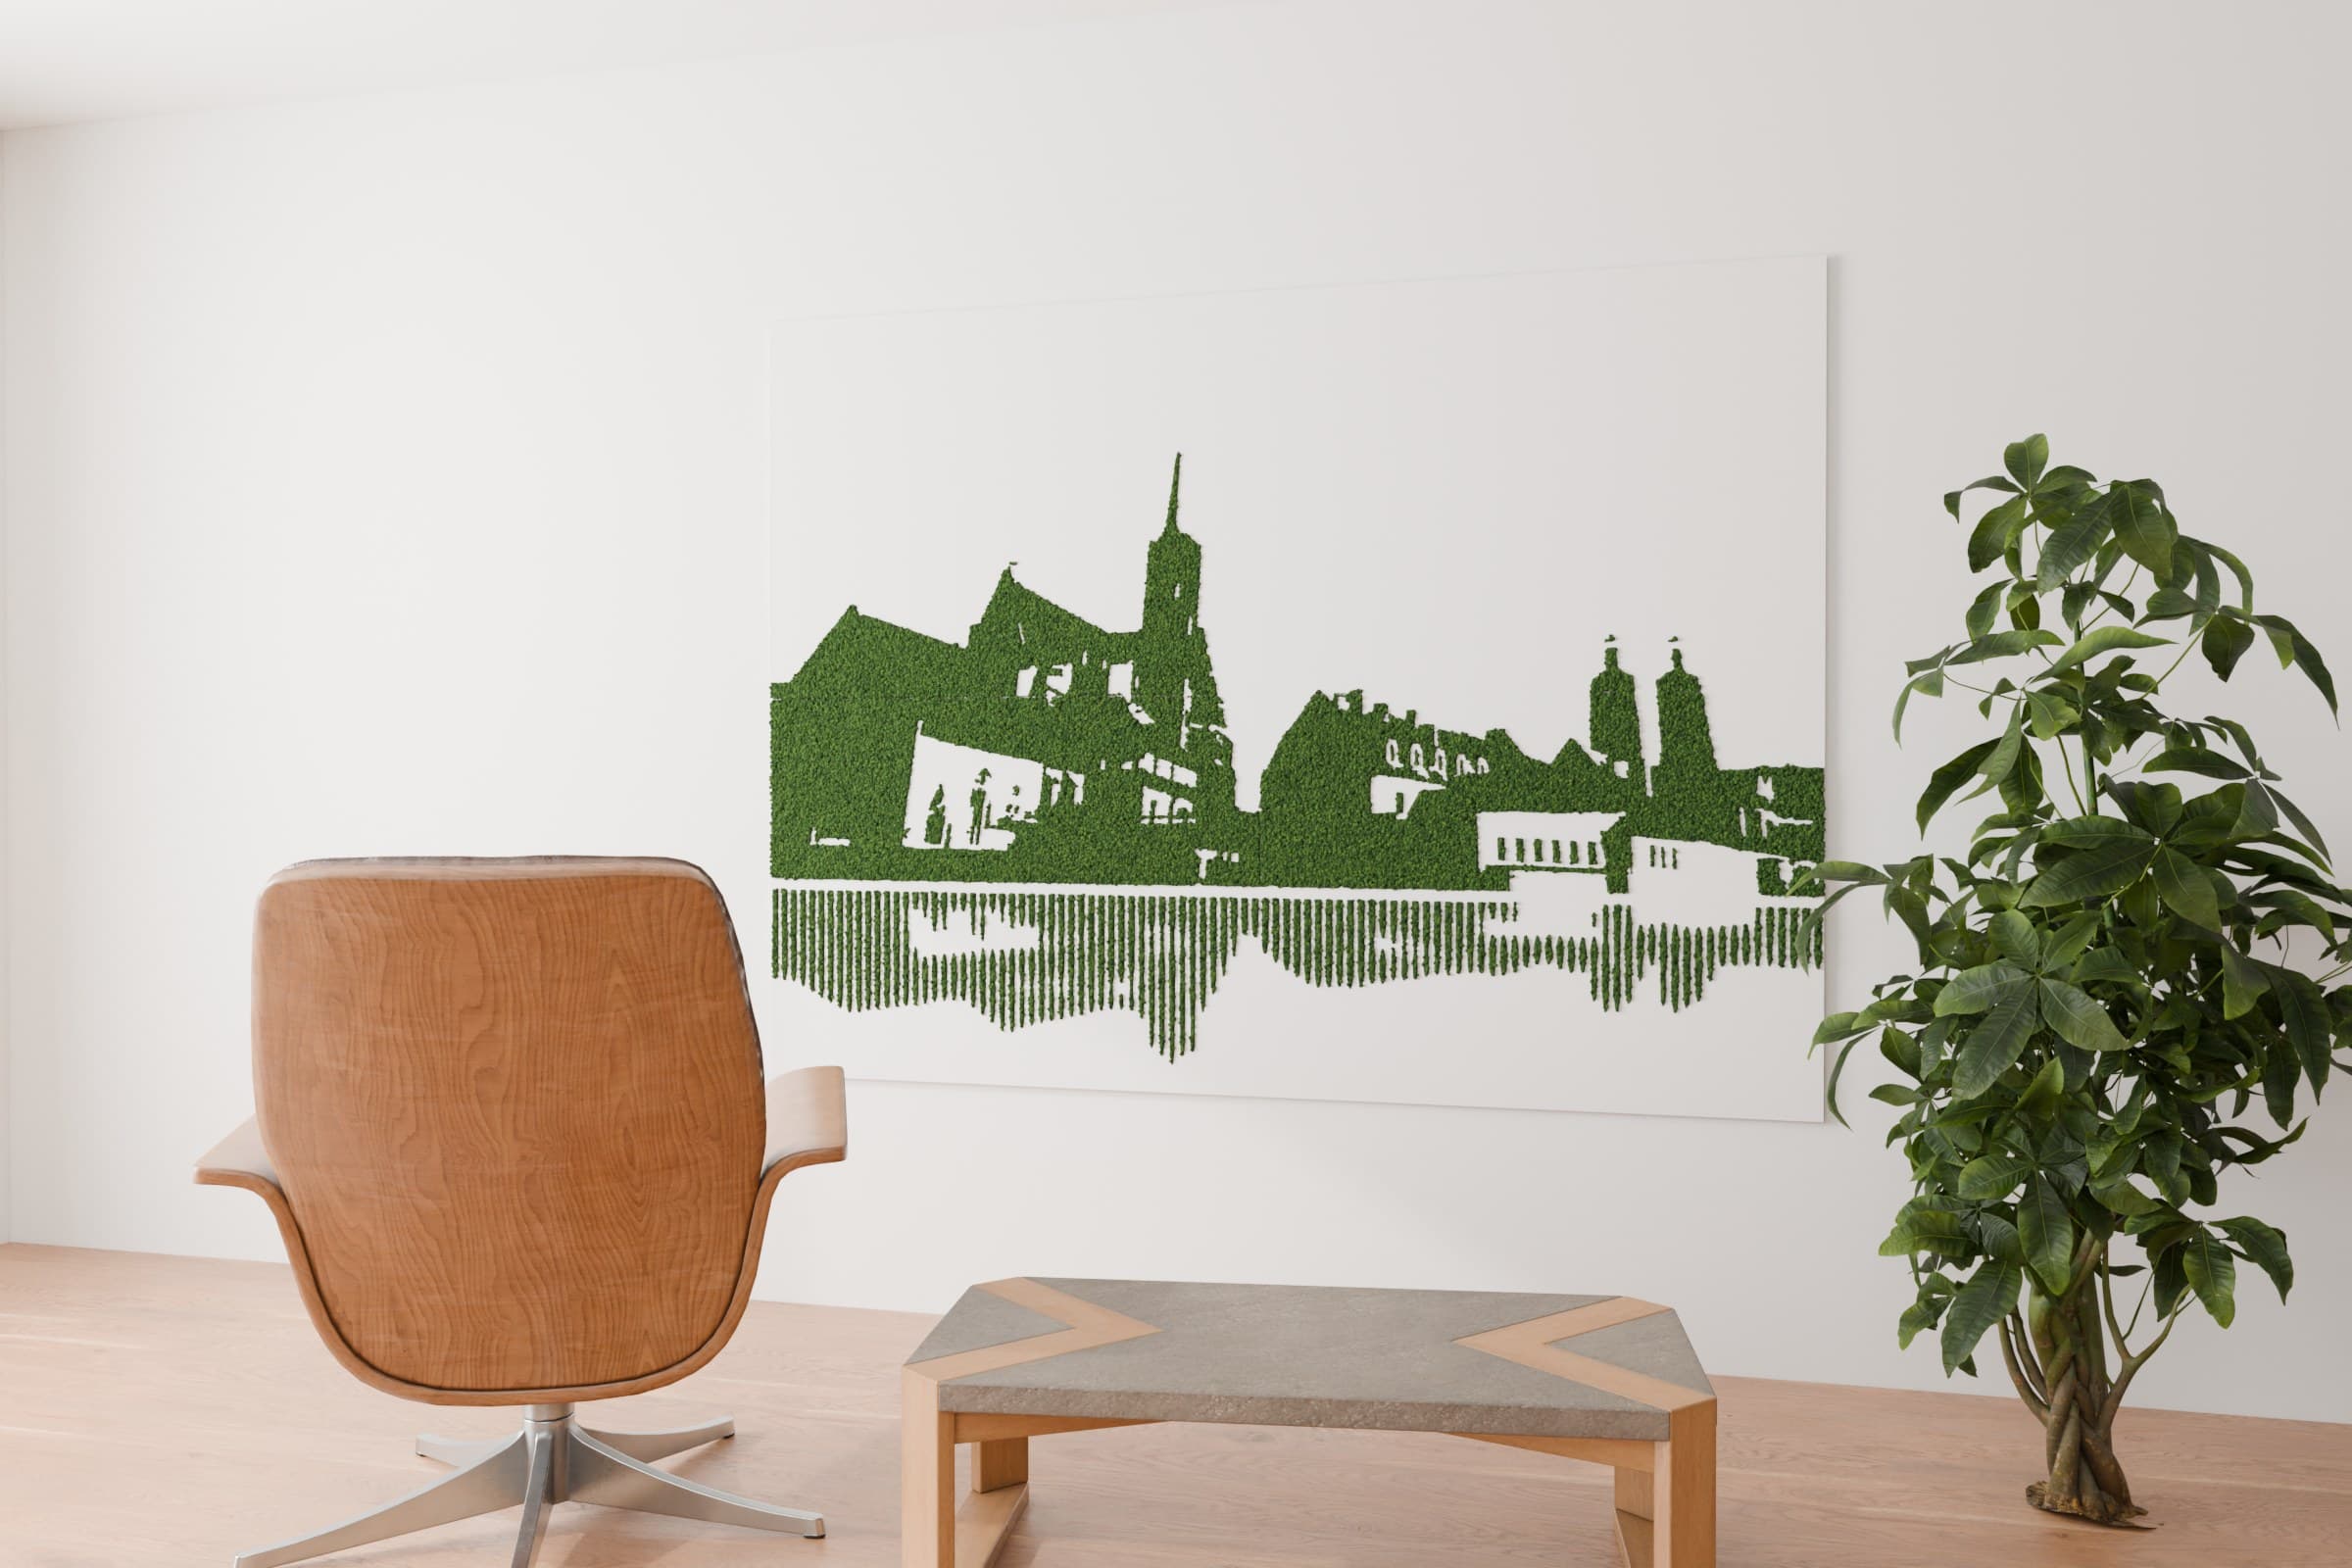
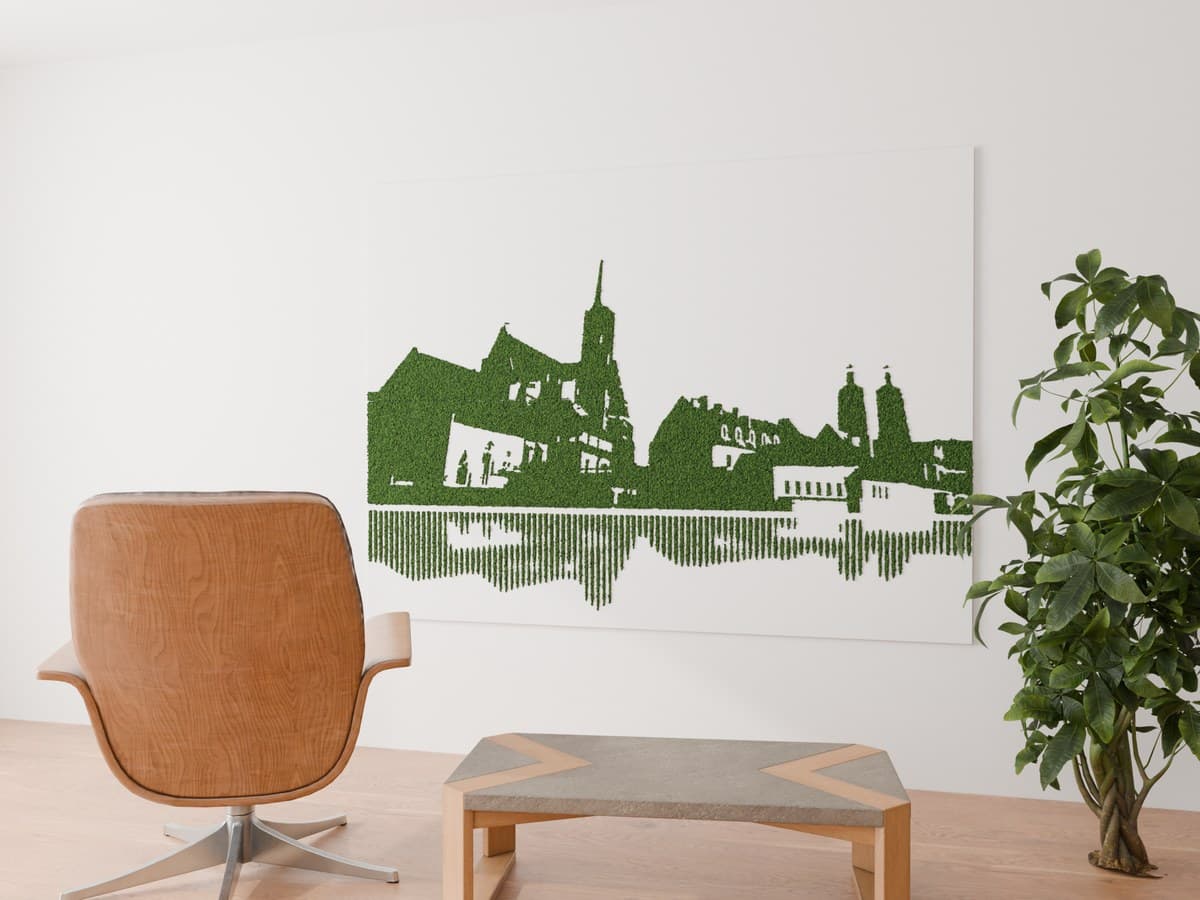
2400 x 1800 panels in a lounge; the client decides on the model.
Problem
A moss wall with a graphic looks simple, but there are traps between the photo and the board. A photo has thousands of tones, while a cutter knows only two states: pocket or board face. Towers, windows and thin lines are often narrower than the cutter and than a tuft of moss, so after milling they vanish or the MDF ribs between pockets crumble. The graphic has to read from several metres away, the wall has to split into panels from standard sheets, and the client wants to see the result before ordering. The machine shop needs a clean file in millimetres, not a picture.
Outcome
The process is ready for a test panel: a configurator for client meetings, a script that turns a photo into checked CNC files, a 3D model, a sheet layout and moss renders. One photo gave 142 pockets and 1.23 m² of moss on a 4.32 m² wall. The next step is a 60 x 60 cm MDF test panel, to check on real moss how it reads from 2-3 metres, how much moss it takes and how long gluing takes. The same route works for a logo, a portrait or any city skyline.
- 01Photo. The starting point is an ordinary picture: Ostrów Tumski seen from the Oder, with the Holy Cross church tower and the cathedral. We crop it to the wall's 4:3 proportion, 2400 x 1800 mm.
- 02Configurator. Our in-browser configurator turns the photo into a pattern live: a threshold silhouette, dots on a hexagonal grid, parallel lines or lines that flow along contours. Dimensions are in millimetres from the start, so in a meeting the client sees a variant on their own wall, not a preview to approve next week.
- 03Graphic. On the same photo we compare three techniques, threshold, hexagons and lines, and choose the composition: a threshold silhouette of Ostrów where light walls stay bare board, and below the embankment its reflection in the Oder. The reflection is not drawn by hand: it is the same silhouette flipped, squeezed into the water zone and turned into vertical grooves that taper towards the bottom.
- 04Vector in millimetres and cutter check. The production script turns the graphic into closed pocket outlines and checks every one: the Ø6 cutter must reach everywhere, MDF ribs between pockets are at least 5 mm, specks under 150 mm² are dropped. The tip of the tower is narrower than the cutter and a tuft of moss, so the script blunts it instead of leaving the problem to the machine shop. After the check the cutter covers 99.8% of the pocket area.
- 05Panels and 3D model. The wall splits into four 1200 x 900 mm panels that together come out of one 2800 x 2070 sheet of 18 mm MDF. A parametric build123d model cuts 142 pockets 10 mm deep. For the machine shop there are STEP and DXF files of every panel, with the pockets on their own layer.
- 06Milling. Toolpaths are computed from the same vector: a finishing pass along the outline and clearing every 3 mm. Inside corners get an R3 radius from the geometry itself and the groove ends are round, because that is how the cutter leaves them. A CNC partner does the milling and confirms machine time before the order.
- 07Moss. The pockets are filled with preserved reindeer moss, hot-glued in. The renders show exactly this model: tufts sit inside the pockets, the board ribs stay visible, and the graphic reads as a photo from afar and as texture up close.
- 08Wall. The panels hang 55 cm above the floor in a lounge area, painted in the wall colour. A render from the model is what the client decides on before production.
Specifications
IE-031- Status
- Process study, test panel in preparation
- Wall
- 2400 x 1800 mm, 4 panels 1200 x 900
- Material
- 18 mm MDF, one 2800 x 2070 sheet
- Pockets
- 142, 10 mm deep, Ø6 cutter
- Moss
- Preserved reindeer moss, 1.23 m² (28.5% of the wall)
- Files
- SVG, DXF and STEP of every panel